Replacement Throttle Cable
With the airbox removed it’s easy to see where the throttle cable attaches and where it broke.
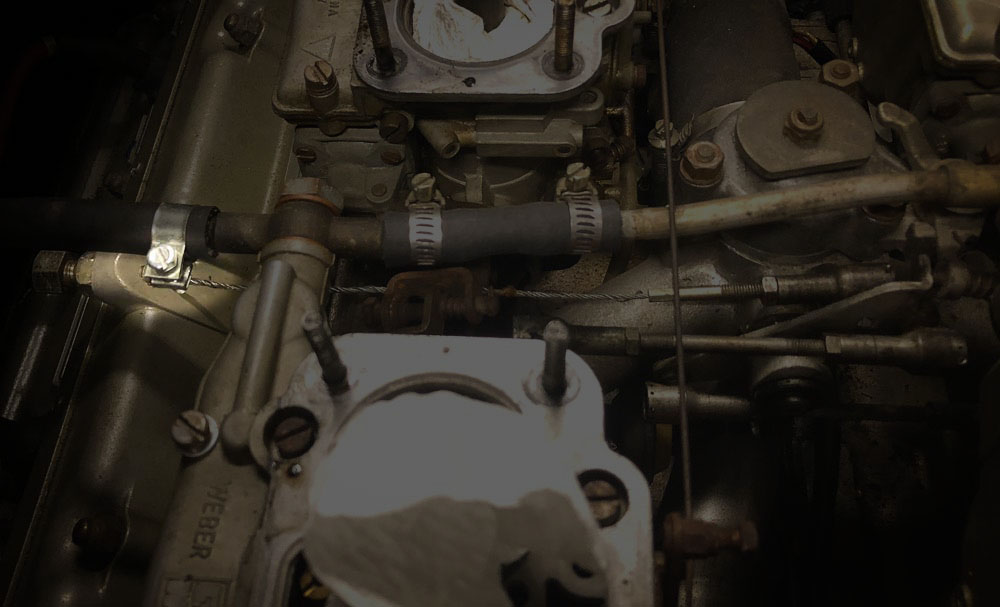
The cable is still attached to the carburetor linkage at the right-hand side and has broken just where it goes through the tensioning bolt on the cam cover on the left-hand side.

The cable has snapped where it exits its sheath. In fact, it’s nowhere to be seen because the throttle pedal falling to the floor has pulled the cable back an inch or two.

The previous owner of my car had a clutch cable break prior to my purchase and being the conscientious owner that he was, he bought a replacement throttle cable at the same time as the replacement clutch cable. So I handily had a replacement in the big box of parts I bought with the car.
So what’s the best way to get the new cable in? The carburetor end of the cable is too wide to go up the pipe on the firewall, so the pedal-end of the cable must go down the pipe.

The simplest way to do this I thought, was to tape the new cable to the old sheath and pull it down through the pipe to under the car and forwards all the way from the back to the throttle pedel: this was plan A.

Easily enough the new cable was pulled down to emerge from the bottom of the pipe under the car. At this point, I should have undone the duct tape, pulled the old sheath the other way to reveal the broken cable so I could then attach the new one to that with different duct tape and continue to pull from the throttle pedal end.
But I didn’t do that…
Because… sometimes… I am stupid.
What I did do was continue to pull the old cable from the throttle pedal end forgetting that the old cable had snapped within the sheath. So when I pulled, I ended up with a broken cable and only the broken cable at the pedal end. The new cable was still at the other end of the car.
Nuts.
Plan B then.
The new cable can be pushed forwards through the chassis member where it enters another pipe below the passenger cabin that guides it some of the way forward towards the throttle pedal.

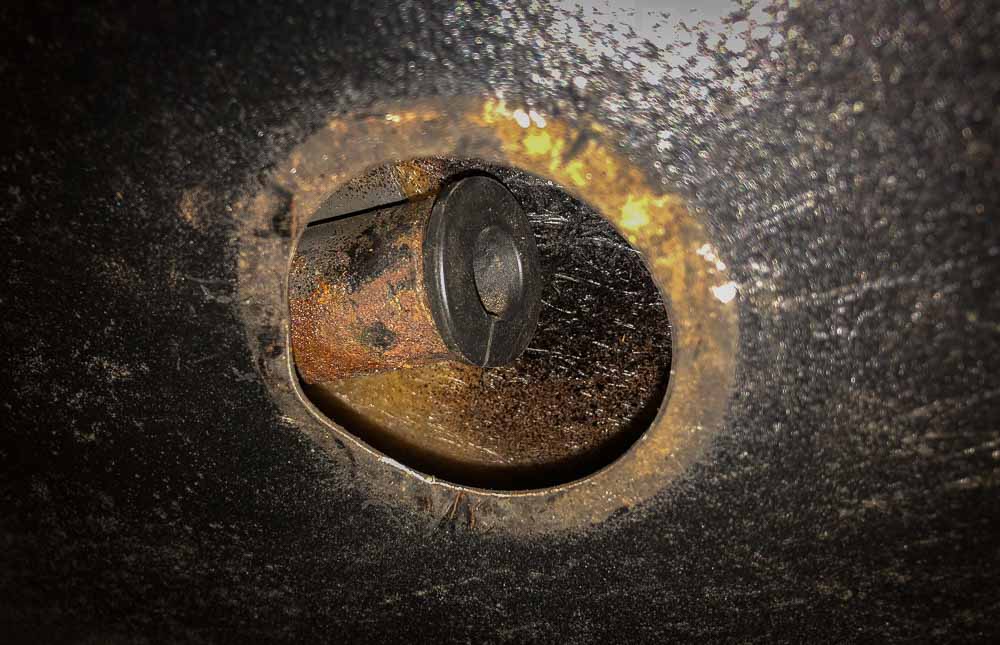
A handy, dandy circular port cut in the undertray and sealed with a rubber grommet half way along provides access to the other end of the pipe where it emerges under the fiberglass floor of the passenger cabin. There’s a plastic grommet that needs to come off the end of that pipe so the end of the cable can be threaded through it.
Then it is forward again to run about a foot between the undertray and the fiberglass floor to reach the throttle pedal; the bottom of which pokes down through fiberglass floor.

With the cable now run from the back to the front, I needed to connect each end. There was a fair bit of under and over to adjust both ends (thankfully using the lift) as the cable is barely long enough to go between.
At the carburetor end, we need to remove the old tensioner bolt and insert the new one since it is fixed to the replacement cable.

Finally, the end of the cable needs to be attached to the throttle linkage of the carburetors. Et voila!

Please feel free to leave a comment below or use the form at the bottom of the page to subscribe so you don’t miss future updates. Your email will not be used for any other purpose and you can unsubscribe at any time using the link in the email. Thanks, David.
Disclaimer: 308restoration.com describes the restoration work I perform on my car and only my car. I am not a professional mechanic. The website content is presented for entertainment purposes only and should not by seen as any kind of advice, information, instruction or guidance for working on any other car. The opinions stated here are my own and no-one else’s.


2 Comments
Toby · July 8, 2021 at 11:30 pm
David, I found your site after buying my old Uncle’s 1977 308 that hadn’t been driven for almost 8 years and was in bad shape but the price was correct! Being a car nut took me on a long time going over much of the car> Dropped the motor, rebuilt all carbs and fuel lines. replaced head gaskets and upper end, recored the radiator, installed an updated AC system as I live in NC! Also replaced the fans with 2 X Spal 10″ electric fans. Got a deal for all 4 aftermarket 16″ wheels with new tires for $1750! new water pump, thermostat, clutch, rear seal, and remove the complete antique emissions system of no use! Powder coated the belt covers and valve covers.
Now have a few more little things: pass. door has a lock problem, is it a trick to remove the door panel?? Headlights only work on high, any ideas??
Would appreciate any help you can provide for me.
Many thanks in advance,
Toby
David Flett · July 9, 2021 at 12:36 am
Hi Toby. Sounds like you’ve done a lot of good work. To get the door cards off, you need to disconnect the electric window switches, remove the arm rest (two or three screws), remove the sealer grilles if you have them, unscrew the trim around the lock button, then undo the small silver screws around the edge of the card ( 5 or 6 screws I think), then the card should lift up off the top edge.
For the headlights, the issue is probably the with the molded on end of the stalk or the insides of the column switch. Unobtanium Supply in Groton, Mass can rebuild both parts once you remove them… the end of the stalk can be split with a razor blade but watch for the tiny ball bearing that will fall out. Separating inside a plastic bag is a good tip. Fir the switch the stalk goes in to, the steering wheel needs to come off, then the lock nut, then the cowl and then the switch unit should be in front of you. It’s been a few years since I did this work so my recollection might not be perfect. Hope that helps.